App的工程结构
1.工程目录说明
如图1-1所示,该工程有两个目录:一个是app,另一个是Gradle Scripts。
app下面有3个子目录,功能说明如下:
(1)manifests目录,下面只有一个xml文件,AndroidManifest.xml,是App的运行配置文件。
(2)java目录,有3个包,第一个包存放的是App工程的java源代码,后面两个包存放的是测试用的Java代码。
(3)res目录,存放的是App工程的资源文件。
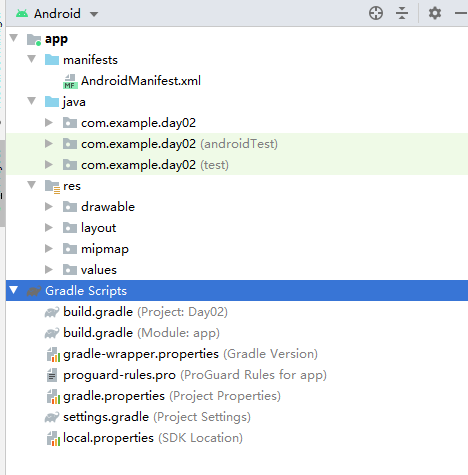
Gradle Scripts主要是工程的编译配置文件
- build.gradle,该文件分为项目级和模块级两种,用于描述App工程的编译规则。
- proguard-rules.pro,该文件用于描述java文件的代码混淆规则。
- gradle.properties,该文件用于配置编译工程的命令行参数,一般无需改动。
- settings.gradle,配置哪些模块在一起编译。初始为include’:app’,表示只编译App模块。
- local.properties,项目的本地配置,一般无需改动。用于描述开发者本机的环境配置。
2.编译配置文件build.gradle
apply plugin: 'com.android.application'
android {
    //指定编译用的SDK版本号。如29表示使用Android 10.0编译
    compileSdkVersion 29
    //指定编译工具的版本号,这里的头两位数字必须与compileSdkVersion保持一致
    //,具体的版本号可在sdk安装目录的“sdk/build-tools”下找到
    buildToolsVersion "29.0.3"

    defaultConfig {
        //指定该模块的应用编号,App的包名。该参数自动生成,无需修改
        applicationId "com.example.day02"
        //指定App适合运行的最小SDk版本号,如28表示至少要在Android 9.0上运行
        minSdkVersion 28
        //指定目标设备的SDK版本号,即该App最希望在哪个版本的Android上运行
        targetSdkVersion 29
        //指定App的应用版本号
        versionCode 1
        //指定App的应用版本名称
        versionName "1.0"
        //一个Instrumentation运行针对Android包(应用程序)JUnit3和JUnit4测试。
        //AndroidJUnitRunner 类是一个 JUnit 测试运行程序,可让您在 Android 设备上运行
        //JUnit3或JUnit4型测试类,包括使用 Espresso 和 UI Automator 测试框架的测试类。
        testInstrumentationRunner "androidx.test.runner.AndroidJUnitRunner"
    }

    buildTypes {
        release {
            //指定是否开启代码混淆功能。true 表示开启混淆,false表示无需混淆
            minifyEnabled false
            //指定代码混淆规则文件的文件名
            proguardFiles getDefaultProguardFile('proguard-android-optimize.txt'), 'proguard-rules.pro'
        }
    }
}

//用于指明需要用到的第三方库,通常AS 项目中一共有三种依赖方式:本地依赖、库依赖和远程依赖。
dependencies {
    //指定引用jar包的路径
    implementation fileTree(dir: 'libs', include: ['*.jar'])
    //依赖的基础库
    implementation 'androidx.appcompat:appcompat:1.1.0'
    implementation 'androidx.constraintlayout:constraintlayout:1.1.3'
    //指定单元测试编译用的junit版本号
    testImplementation 'junit:junit:4.12'
    androidTestImplementation 'androidx.test.ext:junit:1.1.1'
    androidTestImplementation 'androidx.test.espresso:espresso-core:3.2.0'
}
3.App运行配置AndroidManifest.xml
AndroidManifest.xml用于指定App内部的运行配置,是一个XML描述文件。
application 用于指定App的自身属性
activity 元素该元素声明一个实现应用可视化界面的Activity(Activity类子类)。
这是 application 元素中必要的子元素。所有Activity都必须由清单文件中的 activity 元素表示。
任何未在该处声明的Activity对系统都不可见,并且永远不会被执行。intent-filter 元素,指明这个activity可以以什么样的意图(intent)启动。
该元素有几个子元素可以包含。我们先介绍遇到的这两个:action 元素,表示activity作为一个什么动作启动,
android.intent.action.MAIN表示作为主activity启动。category 元素,这是action元素的额外类别信息,
android.intent.category.LAUNCHER表示这个activity为当前应用程序优先级最高的Activity。android:name 数据项名称。
<?xml version="1.0" encoding="utf-8"?>
<manifest xmlns:android="http://schemas.android.com/apk/res/android"
package="com.example.day02">
<application
//用于指定是否允许备份,开发阶段设置为true,上线时设置为false
android:allowBackup="true"
//用于指定该App在手机屏幕上显示的图标
android:icon="@mipmap/ic_launcher"
//用于指定该App在手机屏幕上显示的名称
android:label="@string/app_name"

android:roundIcon="@mipmap/ic_launcher_round"
//true表示支持阿拉伯语/波斯语这种从右往左的文字排列顺序
android:supportsRtl="true"
//指定该App的显示风格
android:theme="@style/AppTheme">
<activity android:name=".MainActivity">
    <intent-filter>
        <action android:name="android.intent.action.MAIN" />

        <category android:name="android.intent.category.LAUNCHER" />
    </intent-filter>
</activity>
</application>
</manifest>
4.在代码中操控控件
创建工程时,Android Studio 默认打开两个文件,布局文件 activity_main.xml和代码文件MainActivity.java
进行第一次工程编写。activity_main.xml
<TextView
     android:id="@+id/psw"
     android:layout_width="wrap_content"
     android:layout_height="wrap_content"
     android:text="Hello World!"
     tools:ignore="MissingConstraints" />
MainActivity.java
public class MainActivity extends AppCompatActivity {
@Override
protected void onCreate(Bundle savedInstanceState) {
super.onCreate(savedInstanceState);
//当前的页面布局采用的是res/layout/activity_main
setContentView(R.layout.activity_main);
//获取名叫psw的TextView控件
TextView psw = findViewById(R.id.psw);
//设置TextView控件的文字内容
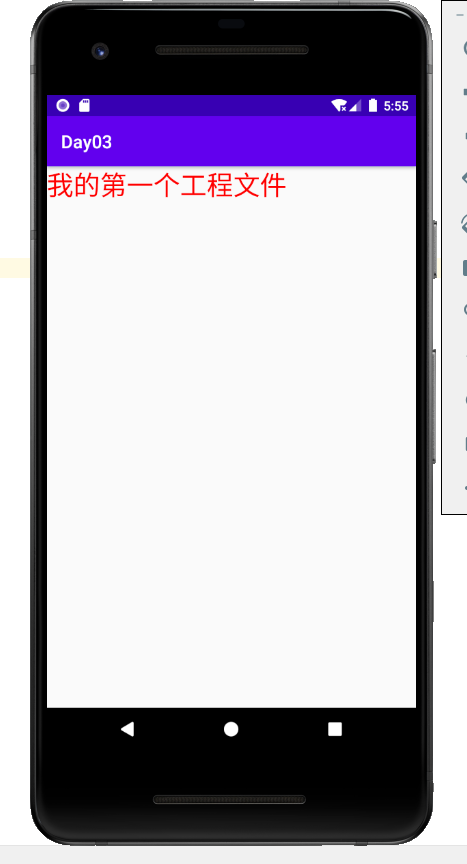
psw.setText("我的第一个工程文件");
//设置TextView控件的文字颜色
psw.setTextColor(Color.RED);
//设置TextView控件的文字的大小
psw.setTextSize(30);
}
}保存文件后依次选择菜单Run->Run’app’,模拟器上运行的结果如图4-1所示。